

What Is Google Settings App On Android
Have you noticed a Google Settings app on your Android device? Last year, Google quietly loaded this app to all Android user devices that run Google services. This app is also known as Google Play Services, where Google apps can connect to Google+. Through this app you can quickly control most Google services settings in one easily accessible app.
Well, to get you to know Google App settings better, we have here a list of 10 features on Google Settings app that every Android user should know. Take note that some of these settings might not show up in your Google Settings app because you do not have the relevant app installed beforehand, for e.g. Google+. Have a tip related to the Google Settings app? Share it at the comments section.
Recommended Reading: 15 Tips And Tricks To Get The Most Out Of Google Play Store
1. Administer your Connected Apps
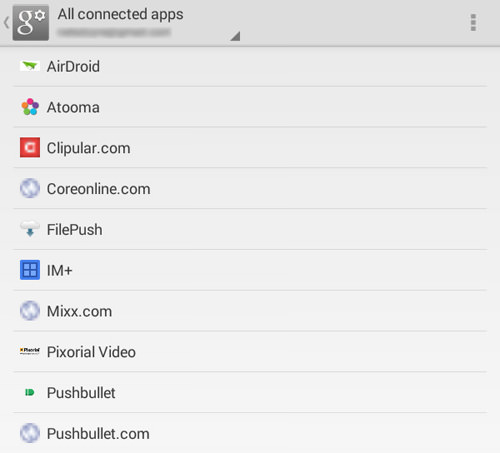
Do you remember what services you have allowed to connect to your Google account? Well, In this Google Settings app page you can look for such information as well as the kind of access they have to your account. You can also disconnect any of the connected apps from your account on this page.
- Open Google Settings app in your app drawer.
- Tap on Connected Apps.
- Tap on any the connected apps to see the access you have given them.
- To disconnect from the app, tap Disconnect at the bottom.
2. Supervise Your Google+ Account
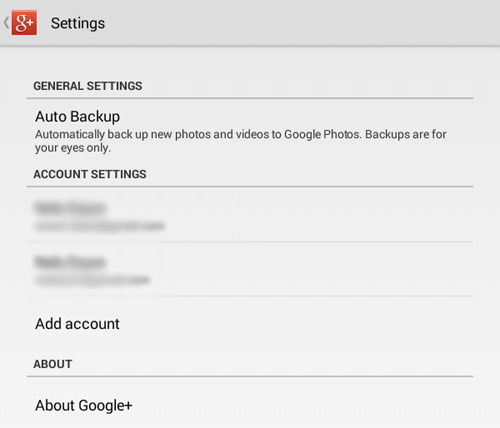
If you have Google+ installed, then you can manage the Google+ auto-backup feature and account settings. This page consists of your Google drive storage as well. To supervise your Google+ account, follow these steps.
- Go to Google Settings app > Google+.
- Tap on Auto Backup to setup backup settings. You can choose to backup your photos/videos only when a Wi-Fi connection is available, when roaming ona data network, when a charger is connected, or back up all now.
- Go back to the previous page and tap on your Google account under account settings. Here you can manage your notifcations, photos, sharing, location sharing, contacts, apps with Google+ sign-in or choose to delete your Google+ account.
3. Handle your Play Games Notifcations
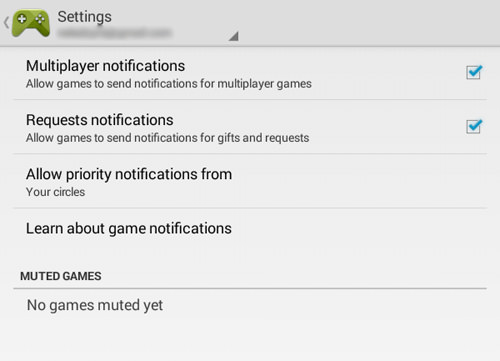
In the Google Settings app, you can handle Play Games notifications you want to receive from your installed Android games.
- Go to Google Settings app > Play Games.
- Tick/Untick Multiplayer Notifications, Request notifications and manage your Allow priority notifications from your circles.
4. Manage Your Search & Now Settings
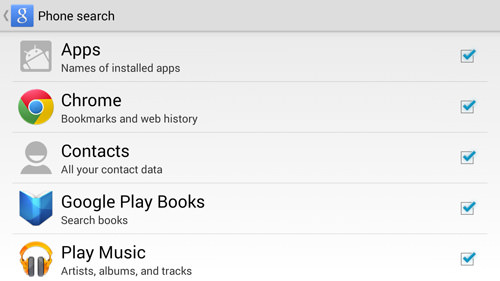
In this Google Settings page, you can enable Google Now plus its Search & Now cards feature. All the options under Search & Now cards will help you optimized your Google Now experience, by including personal results on your Google Now cards, web history, contact recognition and plenty others that you can choose from.
- Open Google Settings app > Search & Now.
- Tap on Google Now to enable or disable it.
On the settings page, tap on Phone\Tablet search and choose which of the following will turn up in your searches: Apps, Chrome, Contacts, Google Play Books or Play Music.
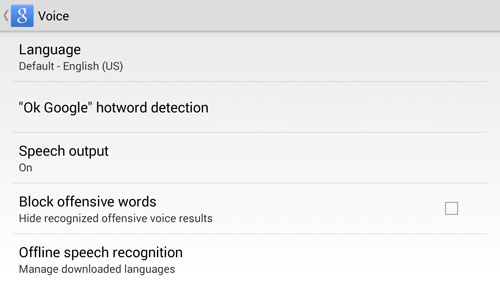
Under Voice, you can select and enable languages, hotword detection, speech output and many other options.
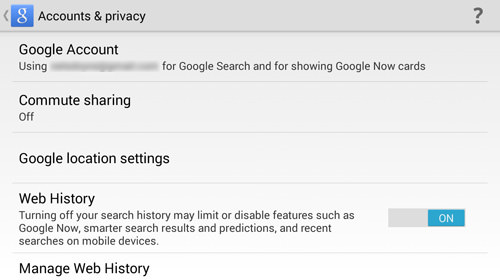
Back to the previous page, then tap on Accounts & privacy to select, enable and manage google account, commute sharing, Google location settings, as well as other account-related options.
5. Ad Control
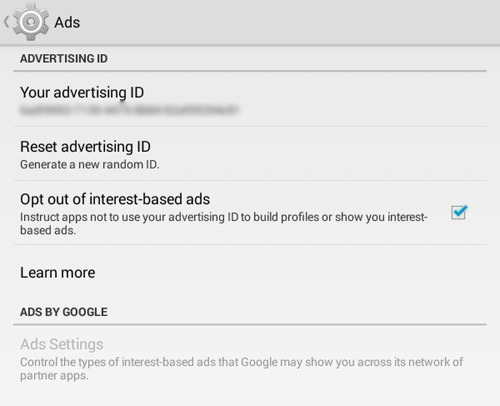
Google Settings also lets you reset your advertising ID (like clearing cookies from your browser) or just opt out of interest-based ads entirely. This gives you more control over the information that is sent to any advertiser serving ads to apps you use.
- Go to Google Settings app > Ads.
- Tap on Reset Advertising ID to generate a new advertising ID. This will force apps to track only your recent history.
- Go back to the previous page and tick Opt out of interest-based ads if you want to disable apps from showing you interest-based ads as well as prevent them from using your advertising ID to build profiles.
6. Enable App Verification To Improve Security
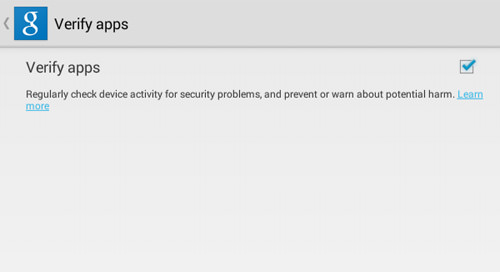
This is an important feature inside the Google Settings app that we believe all Android users needs to use. You can choose to verify the apps you intend to use to prevent security problems, or harmful apps from being installed. You will also receive a warning regarding potential harm on your Android device by any offending app. To do that, follow these steps.
- Open Google Settings app > Verify apps.
- Tick/Untick to enable or disable Verify apps.
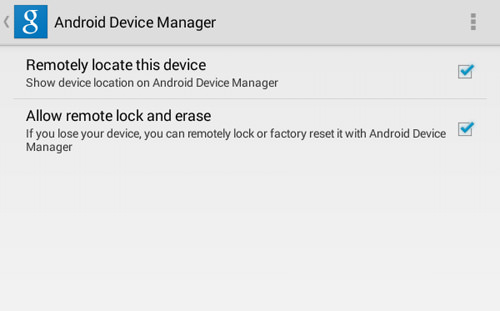
7. Enable Android Device Manager Features
if you already have an Android Device Manager app installed, then these settings should already be enabled by default. If not, you can get the app here then enable the feature with the instructions below.
- Go to Google Settings app > Android Device Manager.
- Tick/Untick to enable or disable Remote locate this device.
- Tick/untick to enable or disable Allow remote lock and erase.
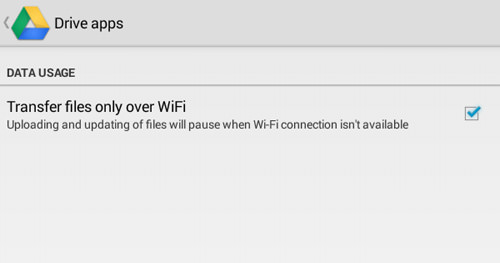
8. Enable Transfer Files Only Over WiFi For Google Drive
If you use Google Drive on your Android device, then it is probably best that you have this feature enabled to save your data plan as well as your battery life. You can enable "transfer files only over WiFi" for Google Drive in the Google Settings page. To enable that, take a look at our steps below.
- Go to Google Settings app > Drive apps.
- Tick/Untick to enable or disable this feature Transfer files only over WiFi.
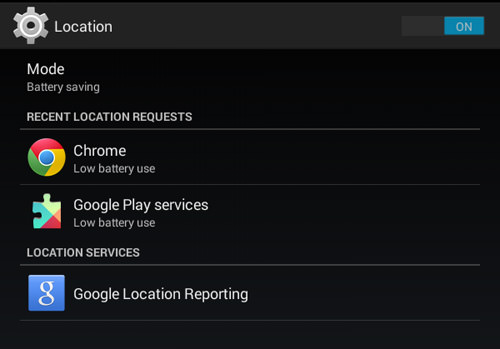
9. Have Your Device Location Enabled
For Google and all location-tracking apps to be able to track the location of your device, you need to enable the Location feature. In the Google Settings page you can choose to enable this feature, decide on the level of accuracy, retrieve apps that request your device location and manage your location report based on your Google accounts. If you're interested in enabling location, follow these steps.
- Tap on Google Settings app > Location.
- Turn On Location at the top.
- Select Mode from High accuracy (Use GPS, WiFi, and mobile networks), Battery Saving (Use Wi-Fi and mobile networks), and Device only (Use only GPS).
10. Clear Third-Party App Data Stored Within Your Google Account
If you would like to clear all third-party app data stored in your Google account with one clean sweep, you can. Before you proceed, understand that by doing this step, you will ultimately clear all your third-party app data and they will no longer be available on any of your devices. So think this through before trying this.
If you would like to proceed, follow these steps.
- Open Google Settings app.
- Tap on the navicon at the top right and select Clear app data from the menu.
- Choose your Google account and read the warning again before you proceed.
- If you are sure, tap on OK to clear app data.

What Is Google Settings App On Android
Source: https://www.hongkiat.com/blog/android-google-settings-app-features/#:~:text=Updated%20on%20May%208%2C%202019,app%20on%20your%20Android%20device%3F&text=This%20app%20is%20also%20known,in%20one%20easily%20accessible%20app.
Posted by: barnestheregoth.blogspot.com
0 Response to "What Is Google Settings App On Android"
Post a Comment